After the installation of Mediabox CK you can create your first lightbox very easily.
- Create a link to an image
- Create a lightbox using the editor button
- Custom settings for your lightbox
- Autoload the lighthox on your images
Create a link to an image
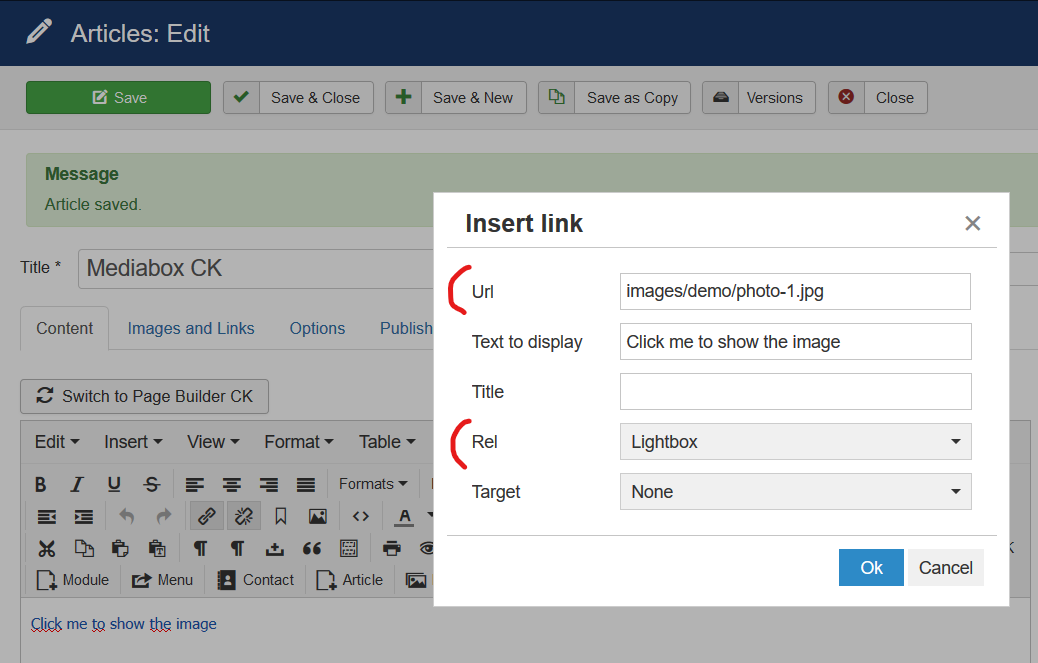
Go in your editor and create a link
- set the url to what you want to show in the lightbox : an image, a video, a website
- set the
reltag toLightbox
Example with a lightbox to an image :
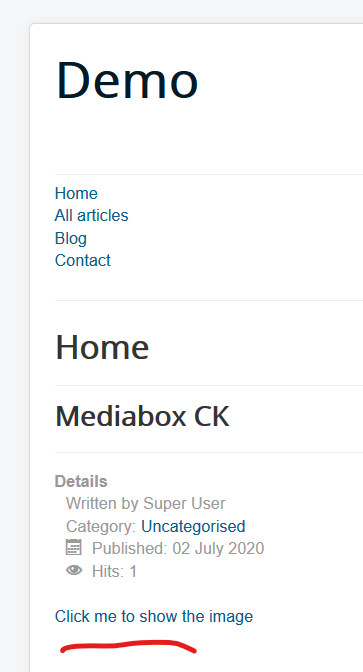
Then you will get a simple link in your article
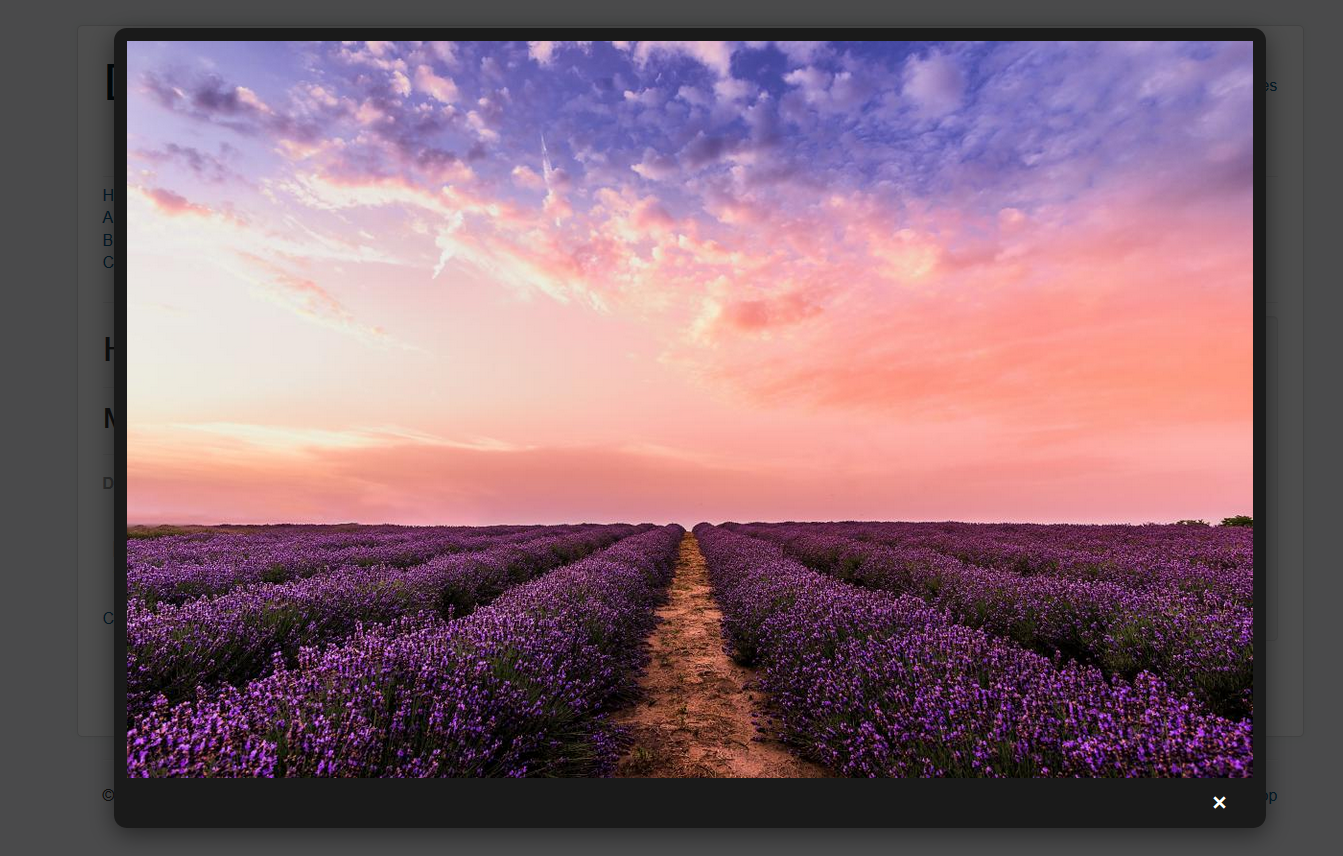
When you click on the link, it will open the Lightbox popup with the image that you have set in the link url
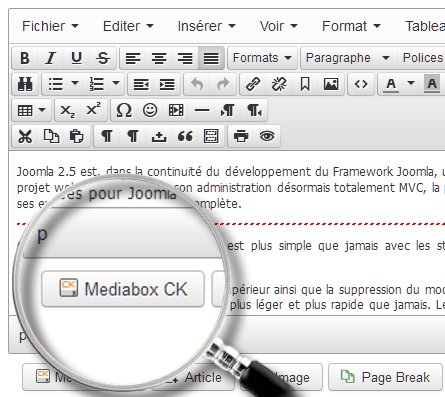
Create a lightbox using the editor button
This is the easiest way to create your lightbox directly with the interface. Click on the Mediabox CK button in your editor
It will open a popup with the settings that you use to control how to show your lightbox.
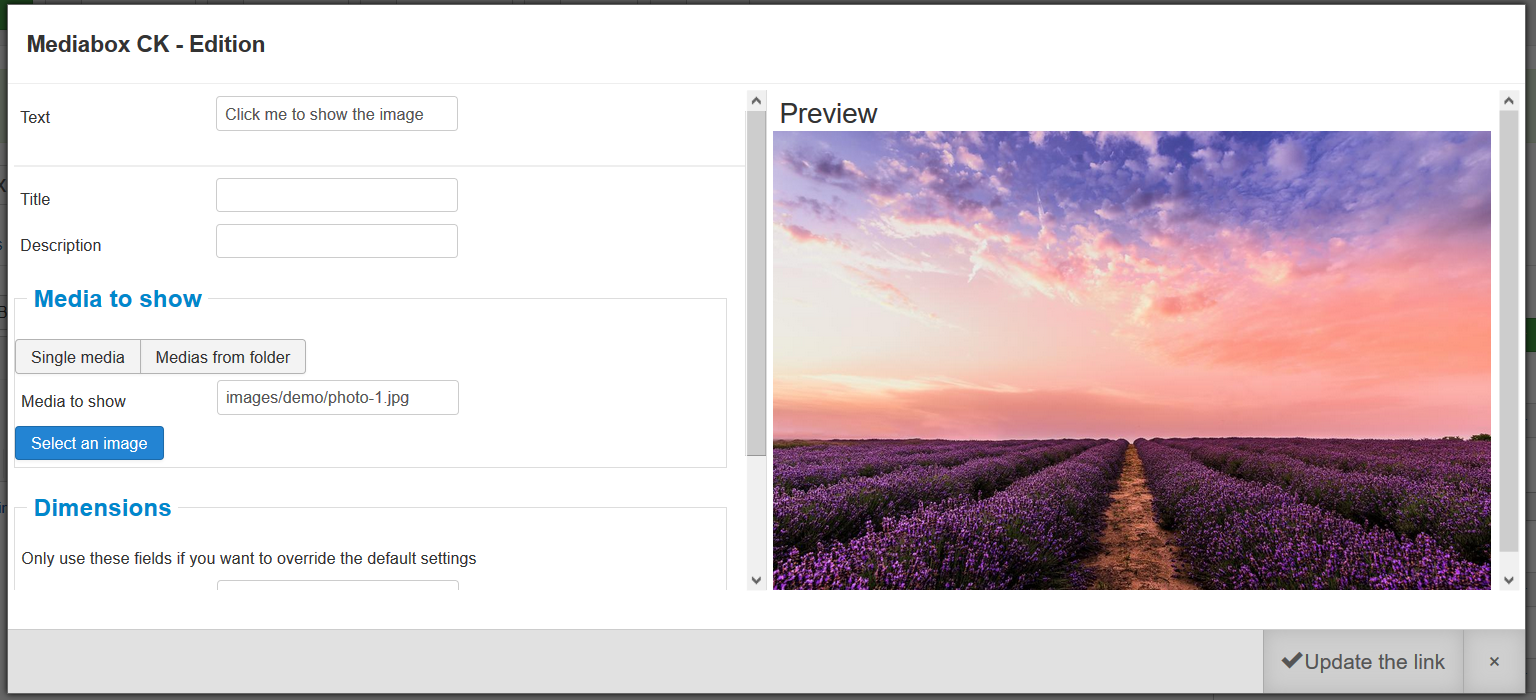
You can use the interface to select the image to show in the lightbox, to create a gallery, add few settings to control your lightbox.
Custom settings for your lightbox
You can customize your lightbox to adapt it to your needs. Here are few options that you can use with Mediabox CK :
- Render the images in a gallery with the
galleryparam and load them from a folder - Use any effect of Image Effect CK in the gallery
- Display the images from the gallery in a random order
- Autoload the lightbox on all your images in your website, or only to the images by filtering with a css class
- Automatically create the thumbnails of the image according to the image attributes (width and height attributes)
- Group the images into an album so that you can navigate throught them in the Lightbox
You can check all the params and the method to use it in the documentation : Mediabox CK settings
Autoload the lighthox on your images
You can go in the system plugin Mediabox CK to find the options available for the lightbox. Here you can choose to enable the autoload feature :
- it will add the lightbox automatically to all images in your website, or filter with a css class. It will add the link to the image itself to the original source
- it will keep the existing links without modificaiton
You can also enable the automatic thumb creation :
- it will automatically look for all links having the rel="lightbox" attribute and resize the image in the link, if any
- it will automatically resize the images found if you have also enabled the autoload feature
- it will resize the image in the galleries to the dimensions given in the plugin options
- it will resize the images to the width and height given in the image attribute. If no attribute if found, the image is not resized to avoid any issue
For example if you got an image like that in your article
<img src="/images/demo/image.jpg" width="957" height="526" loading="lazy" >
But the image.jpg has a real size of 2800 x 1540. Then Mediabox CK will resize the original image to 957 x 526 and store it in a subfolder "th". This image will be loaded in your page and it will reduce the loading time of your website. The link is automatically added to show the original image (2800 x 1540) in the Lightbox.