
Maximenu CK is fully integrated into the ecommerce extension Hikashop. You can manage your ecommerce megamenu for Joomla directly in the categories settings, or using a fast edition popup. You can list your categories automatically into a single megamenu or include your shop categories into any submenu.
1. Installation
First download the ZIP file that contains the extension. Go into your website administration in the menu >> Extensions >> Extension manager >> Install.
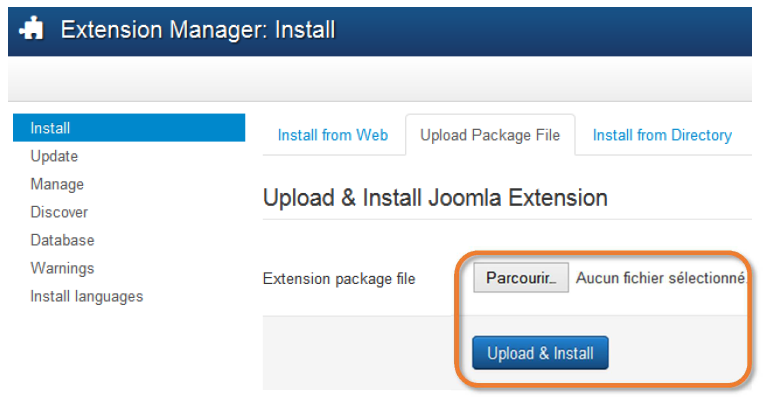
Click on the button to search for the archive that you just downloaded. Then click on Upload & Install. Joomla displays the success message.
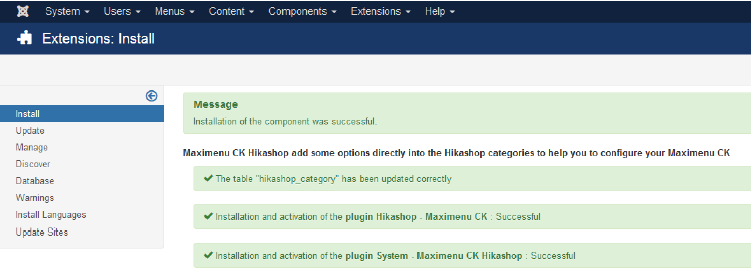
Now the extension is installed and ready to be used. You can find it in the menu >> Extensions >>Plugins.
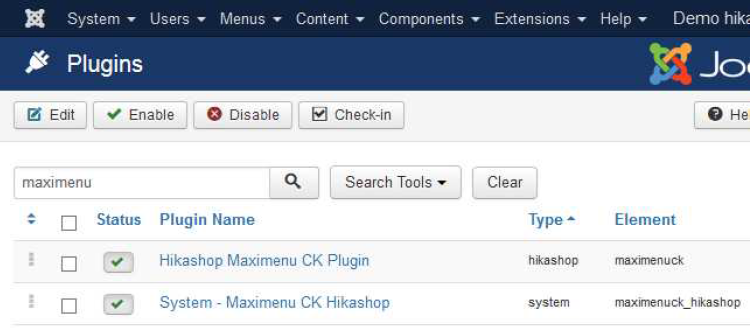
You must check that the plugins are installed and enabled. It shall be enabled by default during the installation process.
2. First steps
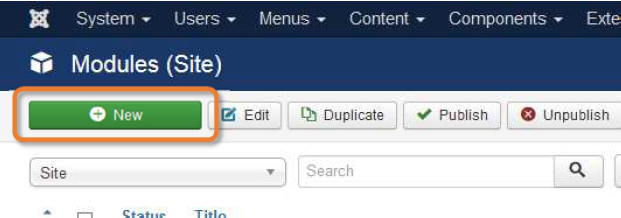
2.1. Create the Maximenu module
At this step, you shall already have installed the Maximenu CK module in your website, as it will not work without it. Go in the Modules Manager >> New >> Maximenu CK, give it a title and publish it on all pages in a template position (for example position-1 if you are using the template Protostar)
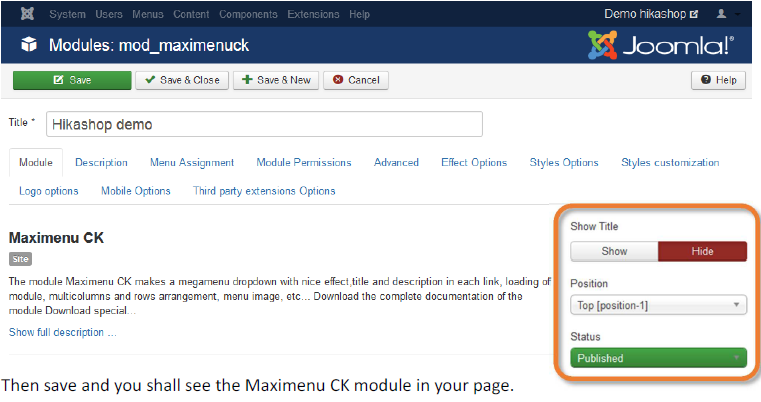
Then save and you shall see the Maximenu CK module in your page. By default Joomla! creates a menu module type mod_menu in the position-1, so you should unpublish it to only have the Maximenu CK showing.
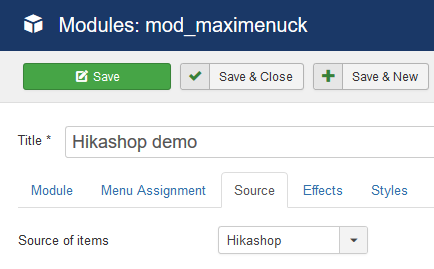
2.2. Configure the module to load the categories
In the module editing, go in the Source tab and select Hikashop in the list
Then select the options that you want to use for your menu. At the beginning you can leave them by default, only choose the Menu Itemid to be Category listing. The Menu Itemid is the menu link item that is linked to the Hikashop categories layout, it will be used to tell to hikashop what are the settings for the categories layout and also used for the urls.

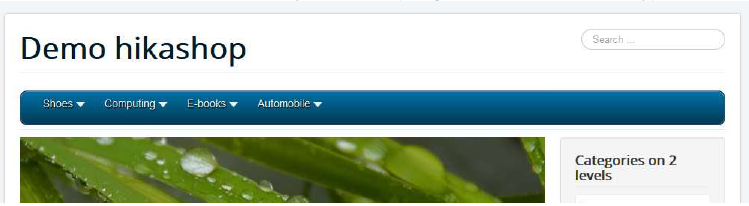
This is how the menu shall look like on your website (using the demo data of Hikashop)
3. Setup the menu
3.1. Overview
You can set the options in 2 ways :
- Directly in the categories listing with the Maximenu CK button in the toolbar of the Hikashop component

- In the Hikashop category edition page
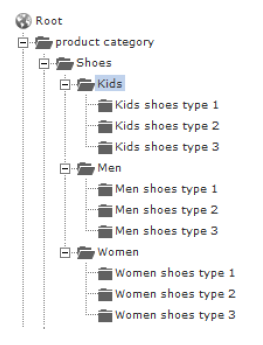
You will get the same options as in the popup, but here you can set it directly when editing the category. You can use both the popup or the category editing page, the settings are the same. In the documentation we will focus on the poup method which is easier and faster. Here is a screenshot of the categories tree that we will use in the examples for the documentation
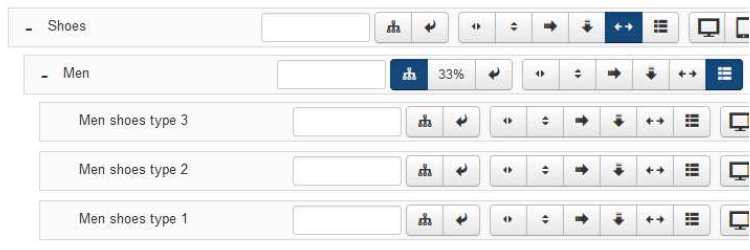
3.2. Create the columns
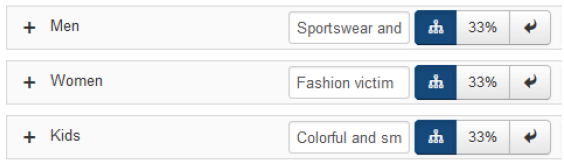
We will create a column on each subcategory of Shoes, I mean Kids, Men and Women. Click on the Maximenu CK button to open the popup and click for each category on the Create a column button. By default it will give a column width of 180px, you can change this value if you want.
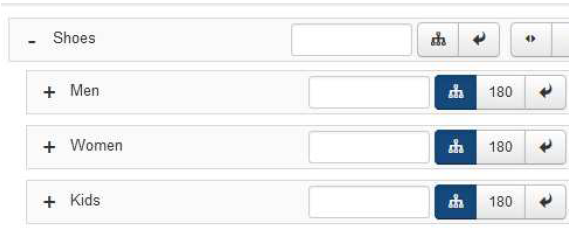
You will see the columns that are created, the 3 categories are horizontally aligned.
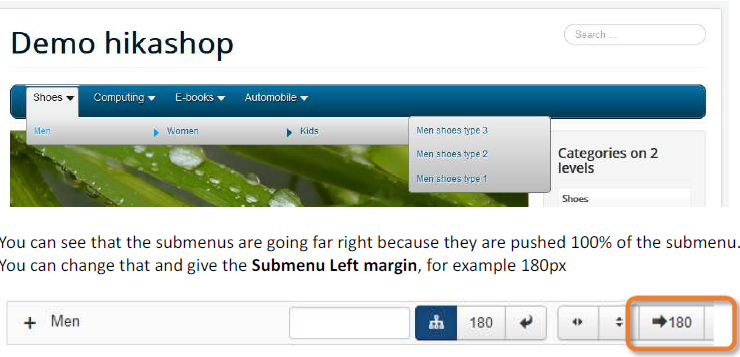
Then you will get your submenu near to the Men item
3.3. Fullwidth submenu
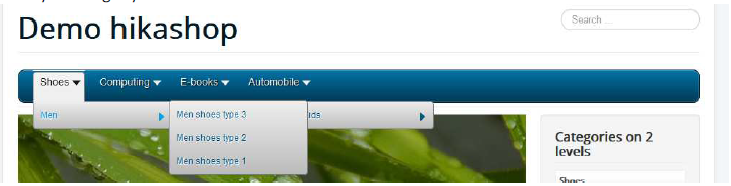
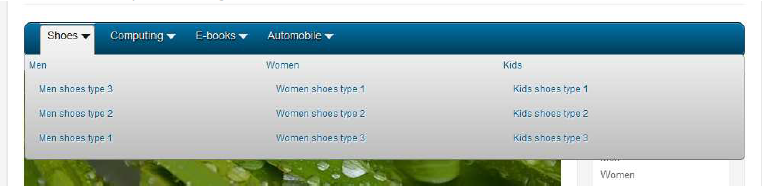
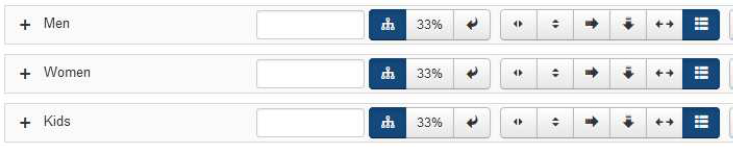
We can create a fullwidth submenu with a simple click. Click on the Fullwidth button to make the submenu of Shoes take the full width of the menu.

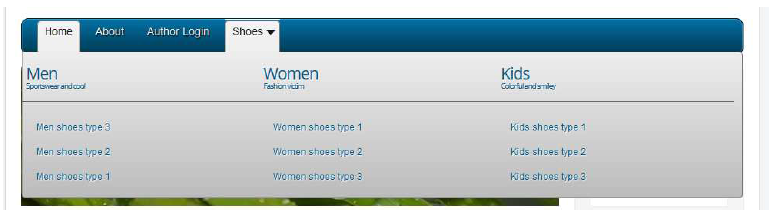
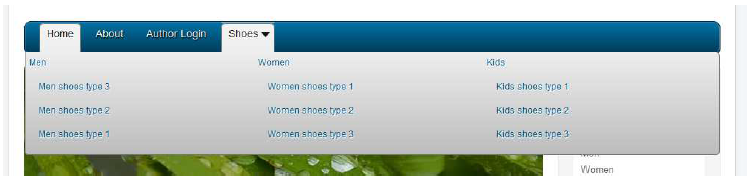
To have the column fit in the fullwidth submenu, you can create them with a width in %. For example we will give 33% for each of the 3 columns Here we get our 3 columns aligned in the fullwidth submenu

3.4. Flat display in submenu
Sometimes you need to display the children categories directly under the parent category, without dropdown nor flyout. For each 3 categories Kids, Men and Women, click on the Stop dropdown (flat display) button to make it flat with its direct children
And here is what you should get
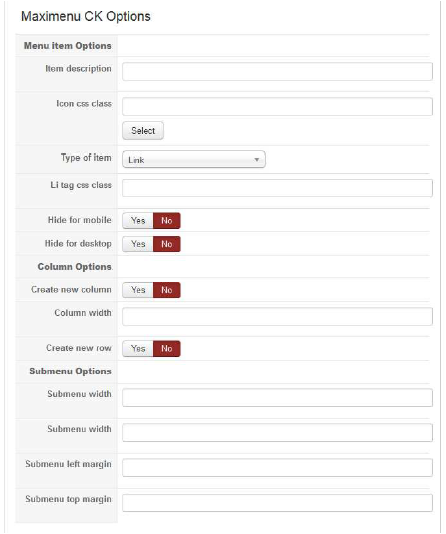
3.5. Hide on mobile, desktop and icons
You can also use the other options to hide your categories on mobile, or desktop (also on both ! ) and you can select an icon from the list. Just click on the buttons, there is nothing special to explain here as the option is self explanatory.

3.6. Set column heading
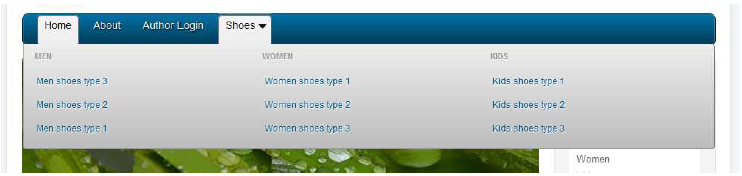
In our example we have 3 categories Men, Women and Kids that are in top of each column. The best would to use them as heading.
Edit the 3 categories, and set the option Type of item on Heading

This will transform the menu item type in a heading type. You can then customize it using your CSS or the Maximenu CK Params interface. Here the parent category is no more clickable and is used only as column title.
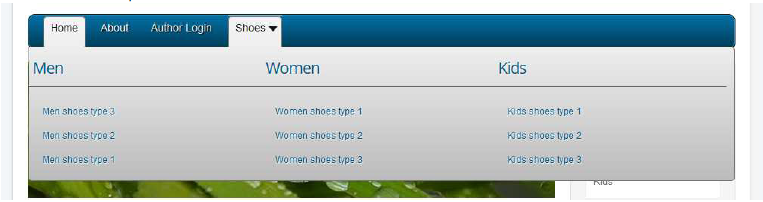
If you want to keep the category as a link and also give it a special style, you can use the Li tag css class to add any class to style the item

Then use your CSS to set the design you want. Or simply use the Html tag option to transform your menu link into a title with the title tags, like H2.

Here is the example of how it looks like
3.7. Add a description
For each category you can give a description. This is usefull to give more meaning to your menu items and give some information to your visitor. Go in the Maximenu CK interface and set the description in the field.
It will be added immediately to your menu
4. Combine normal menu and the categories listing
This is a scenario that we can see in many websites. For example you want to have the menu items in the menu bar for the home, the contact page, etc and also have your categories listed automatically in a submenu. You can do it !
4.1.Create the normal menu module
This step is standard as you will need to show the normal menu items at first. Create a Maximenu CK module and publish it in a template position, and set it to load a normal menu (here the Main Menu)

You will get your menu links without submenu in our example
4.2. Create the submenu listing
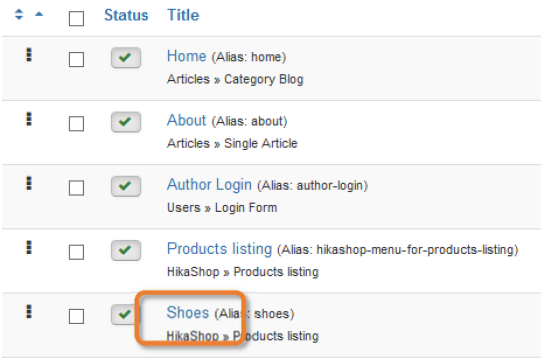
Go in the admin >> Menu >> edit your menu (Main Menu) and create a new menu item that will will be the parent of the categories. This can be any menu item type, just the one you want. Here is our menu structure with the new Shoes menu item.
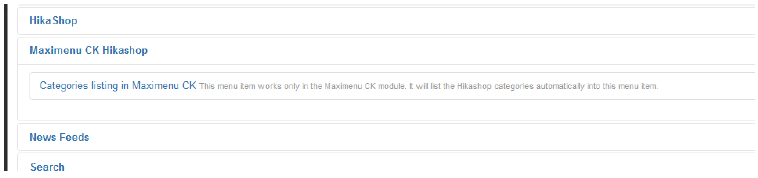
We will then create the menu item that will load our categories automatically in the menu. Create a new item and select the type Maximenu CK Hikashop :
You will get the options in the menu item edition :
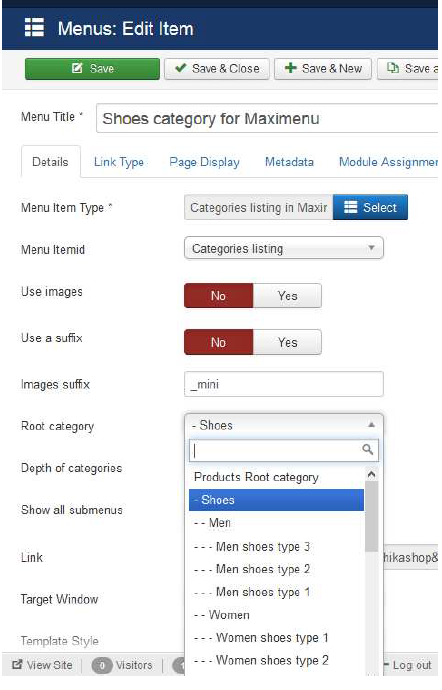
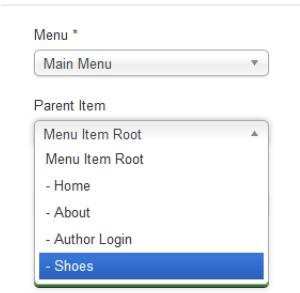
You shall select the Menu Itemid which is the Hikashop menu link used for your listing that will tell how to display them in the page Then select the Root category to display, here the Shoes category is what we want so that all children will be displayed in our submenu. Don’t forget to set the parent item for your link, to put it under the Shoes menu item that we have created previously
This is now the menu structure that you shall get :
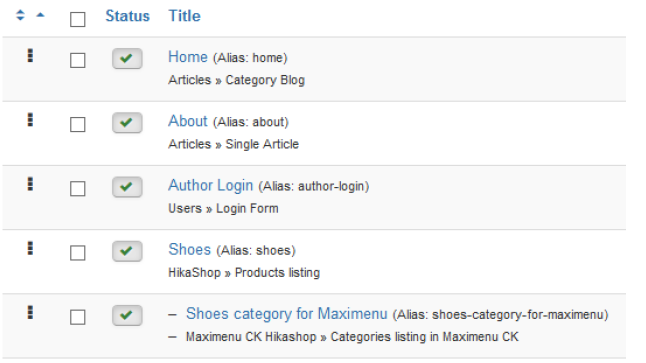
That’s it, your menu will load automatically all the children categories of Shoes in the submenu

You can then use the settings that we have seen previously in the Chapter II to create a fullwidth flat submenu with columns :
And the result :


News