When using Page Builder CK for Joomla, you can create your own library to use in your website. But what is a library and how it works ? Let's see that all together.
What is a library in Page Builder CK for Joomla ?
A library is a collection of items that you can easily use and reuse for your content creation. There is already a library of items in Page Builder CK, you can see it in the left panel from the interface.
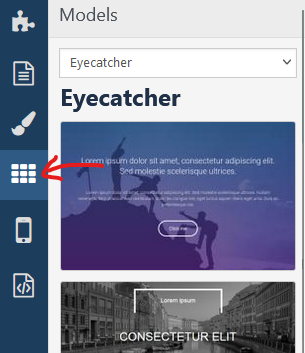
You can drag and drop any of these items in your page or article, then edit it to change the text and the colors. It allow you to create fast design in a very easy way for your Joomla website.
How to create a custom library
If you have already created some pages, you may want to reuse them along all your other projects. Of course you can export the page, then import it in another website, and call it from the pages list. But you can do that better now !
You can
- create a page with your text, colors and also images
- export your page as library
- install the library in any other website and see your pages directly listed in the libraries list in the left panel
This is easy to do, let's see in details how to create the library from your page.
Export the page as library
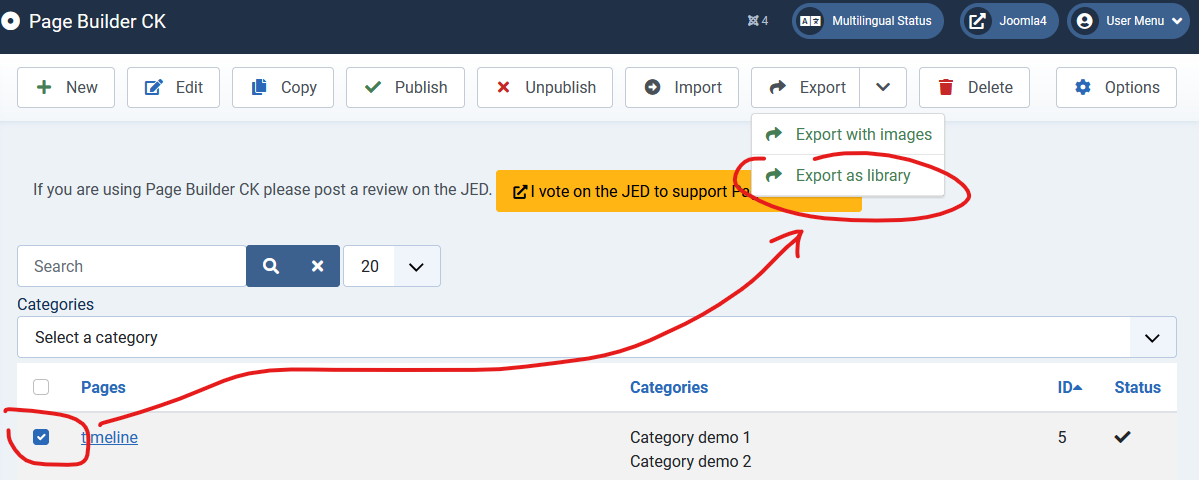
Once you have created the page that you want to reuse in other projects, go in the pages list (admin menu >> components >> Page Builder CK >> Pages library) and select your page. Then click on the dropdown menu of the Export button to reveal the other methods and click on Export as library.
At this stage you will be asked for a Category and Item text. let's see why and how to fill it :
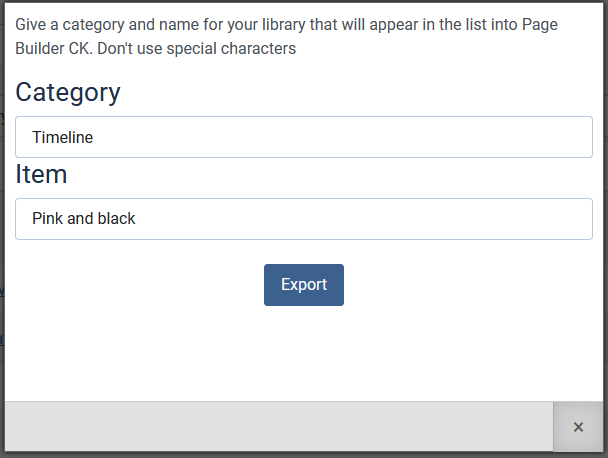
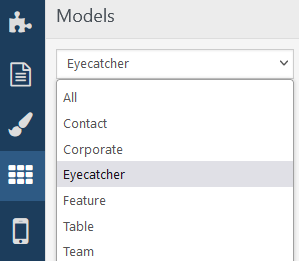
- Category : this is the name that appears in the list of the dropdown menu. A category can contain multiple items. For example if you export multiple pages and give them the same category name, they will be all listed under the same name here. All items from one category
- Item : this is the name of the item that you can add to your content. Each category can contain multiple items. For example if you have a category named
Timeline, you can have some itemsRed,Blue,Black...
Then click on the Export button and you can download your library files. This is a ZIP file that contains the following files in it :
- install.xml : this is the file that is used to install the library in any Joomla website. it will copy the files directly in the folder
[SITE]/administrator/components/com_pagebuilderck/libraries - Folder [Category] : this is the folder that contains the files of the item. The folder name is the category name, you can use the same folder to put multiple items
- [Item].pbck : this is the item, typically the exported data from the page that you selected. It will be automatically loaded in your content when you drag and drop the item from the interface. The filename is the name of the item that you can see in the interface
- images : you can have aditionnal images, this is if your source page has some images (background, gallery, etc ...). The export method automatically saves the images and they will be imported in the library folder
Import the library
To import your library in your Joomla website you must use the Joomla installer, like any other extension. Go in the admin menu >> Extensions >> Manage >> Install and upload the ZIP file. You shall have a success message that tells you that the files have been installed.
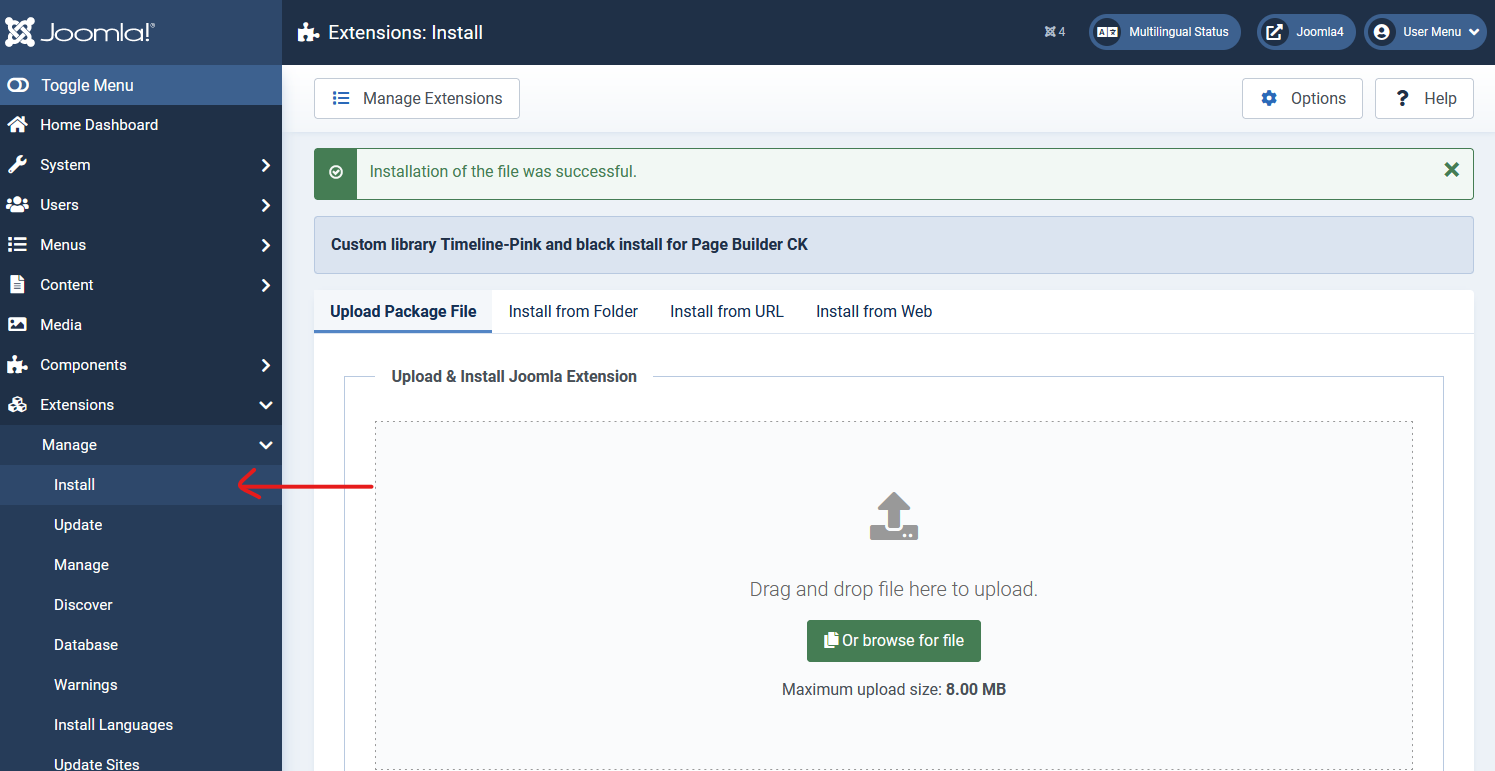
The files have been installed in the folder [SITE]/administrator/components/com_pagebuilderck/libraries
You can now see your new library installed in the list :
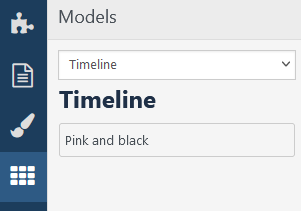
Customize the library infos
You can fill in your own informations in the installation file. To do that you must unzip the ZIP file, edit the xml file and pack it again into a ZIP file.
The data that you can fill with your own values are
- author
- date
- url
- copyright
- version
- description
It could be useful to update these values if you want to share your creation.
You can also edit the package to install multiple items at once.
How to install multiple items at once
By default when you export the page as library, it will create an installable package with the selected page. You can edit the package to install all items from one category (or also to install multiple categories if you want) with only one installable file. Here is how to do :
- unzip the package, you will get the
install.xmlfile and the folder (name of the category) with the.pbckfile and images in it - export all the wanted pages as library and unzip them
- put all the
.pbckand images files into the same folder - pack again the folder and the
install.xmlfile into a ZIP
That's it. The process is very simple : the folder is the category, each .pbck file in this folder is an item. The install.xml file will copy the folder with all the files in it, into your Joomla website.
Add your own thumbnail
By default there is no image for your new library :

But you can do it ! There is a simple method that you can use to improve the visual interface for you and other users by adding a preview image. The image must be placed in the category folder (in the same folder as the .pbck file) and it shall be named the same as the item (.pbck file). Example
Pink and black.pbck: item filePink and black.jpg: thubnail image
The image must be a .jpg image. Then you can see it in the interface like that
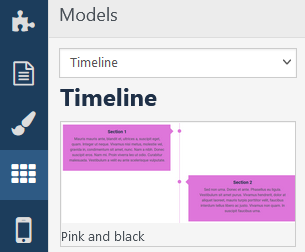
The best dimension for your thumbnail image is 235px width. Try to reduce the size of the image to avoid too much loading time.
Share your libraries with other users of Page Builder CK
Don't hesitate to share your work and also to use the libraries from others. You can get the place to do that on the forum :
https://forum.joomlack.fr/index.php/page-builder-ck





News